Purpleheart Flooring Installation Guide
Step 3: InstallationMeasure the room's width at two or more points to establish an accurate centerline, and snap a chalkline parallel to your starting wall. Then, snap another line about 3/4" from the starting wall, exactly parallel to the centerline. This new line marks the edge of your first flooring plank. The 3/4" gap will allow for the wood to expand.
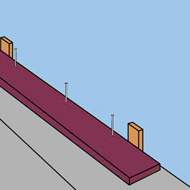
Starting with your longest planks, drill pilot holes for 1 1/2" finishing nails. Face-nail the first row onto through the plywood subfloor and into the joists. Using a nail set, recess the nails below the surface. Make sure the nails are near the wall, so that they will be hidden when you reinstall the shoe molding.
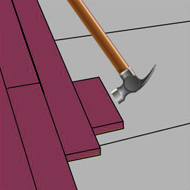
Blind nail the first three rows by hand by drilling pilot holes at 45° angles through the tongues, centered on each joist every 10". Use 1 1/2" finishing nails and a nail set. To make sure each row is tight against its neighbor, move a short piece of scrap along the edge and tap it firmly with a mallet or hammer. Remember that end joints in adjacent rows should be at least 6" apart, and should never line up over a joint in the subfloor.

After the first three rows, use a flooring nailer for large areas. When using a flooring nailer, you need to be careful not to scratch or damage the flooring planks, and use 2" nails. For the final row, use a block and pry bar to wedge the planks into position. Predrill and face nail as you did with the first row.
Finally, clean the floor and give it a final inspection. Usually, the floor will be ready for traffic within 8-12 hours. Arid climates may require more time.